historic home
made functional for modern day living
This project was so fun. Finished project photos forthcoming!
We took a historic home in Ashland, Oregon, that had had additions tacked on over the years— including changing the side of the house where the front door was set (a major energetic move in Feng Shui)—and we updated the living spaces so each space had a purpose and functioned accordingly.
Before the remodel, not a single communal living area functioned well:
The kitchen was too big to be efficient, but not big enough for a central island or butcher block. The counters were tiled, the fridge too small and the main counter that would hold the coffee station and everything that gets dropped upon entering the home, was the cluttered first impression.
The kitchen was intentionally divided from the rest of the living spaces such that there was no place for guests to gather or family to hang out while the cook finished the meal.
The dining room space was originally the front door entrance. The original front door was still in place, connecting you to the sidewalk and busiest side of the house. It felt like a walk-way more than a dedicated room and it was not large enough to accommodate a family gathering.
The “sitting area” next to the dining room was an awkward pass-through to the newly enclosed porch “sun room,” which was the only area that got any significant light.
The powder room was huge and used to include the laundry area as well, but was now functioning as a quasi-pantry.
The living room had no decent way to setup the spaces for connection or for TV watching, with the couches too far away and the space largely unused.
Most of the spaces saw little to no direct natural light, meaning people didn’t want to spend time in these communal spaces.
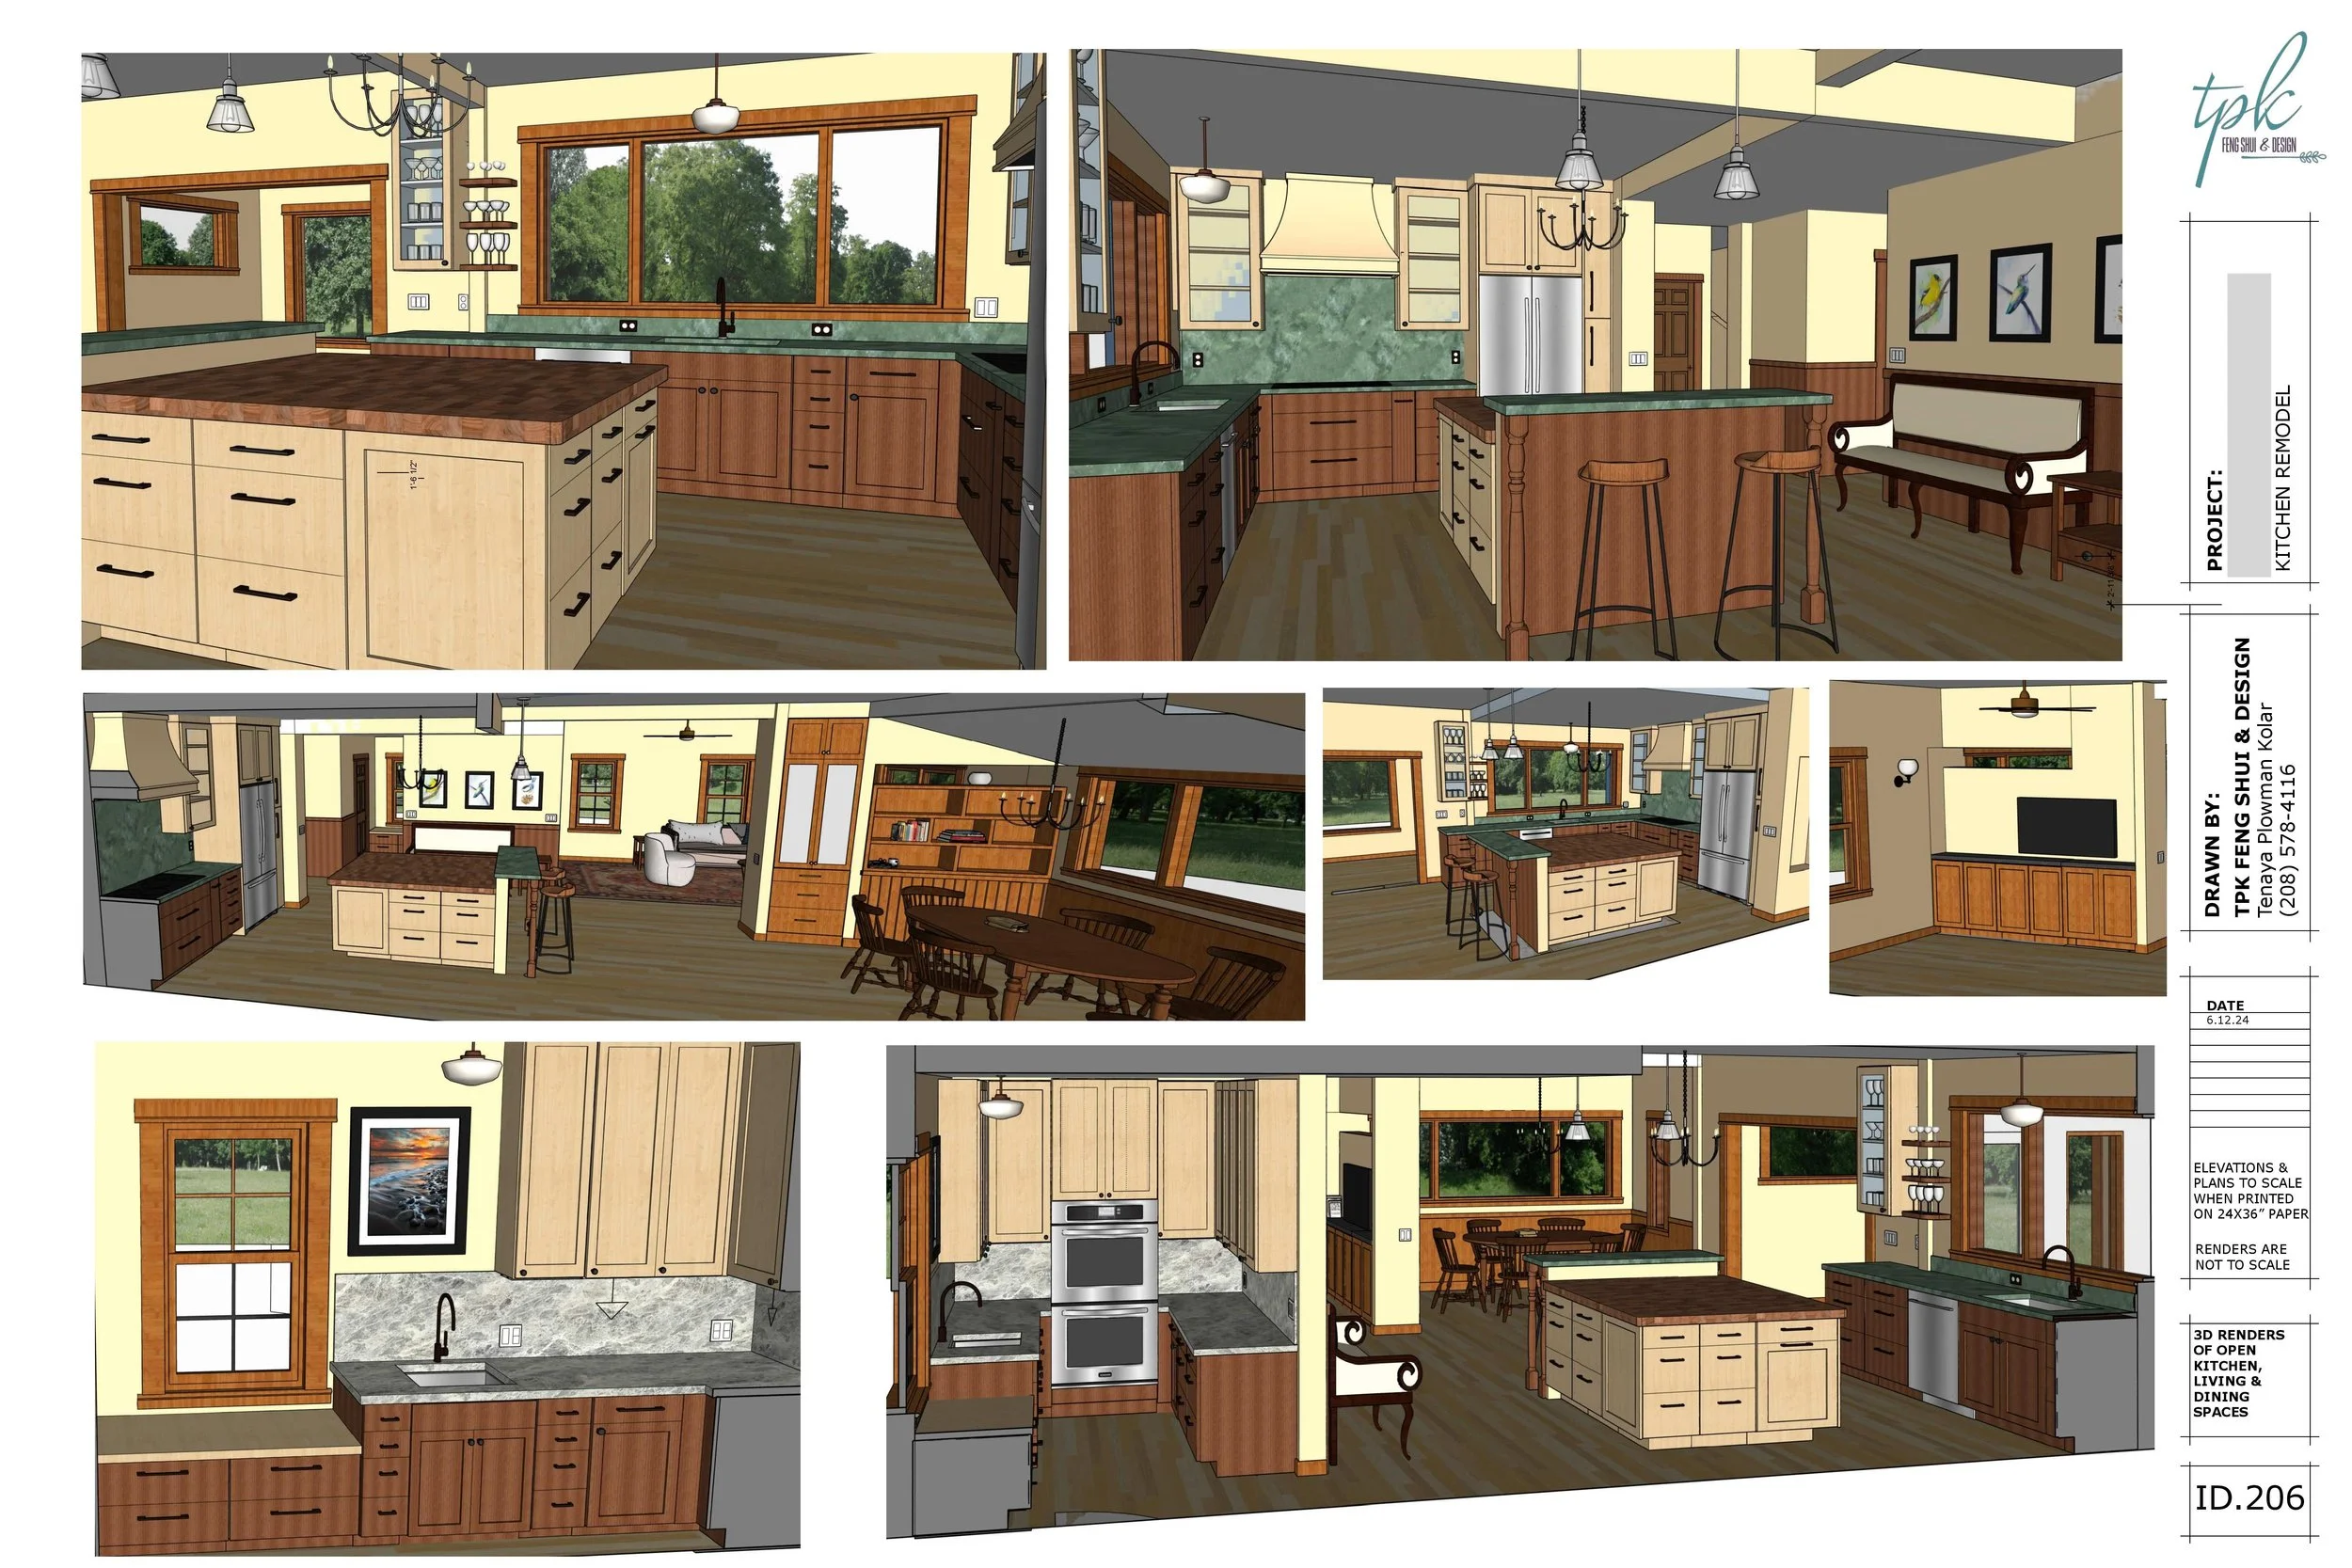
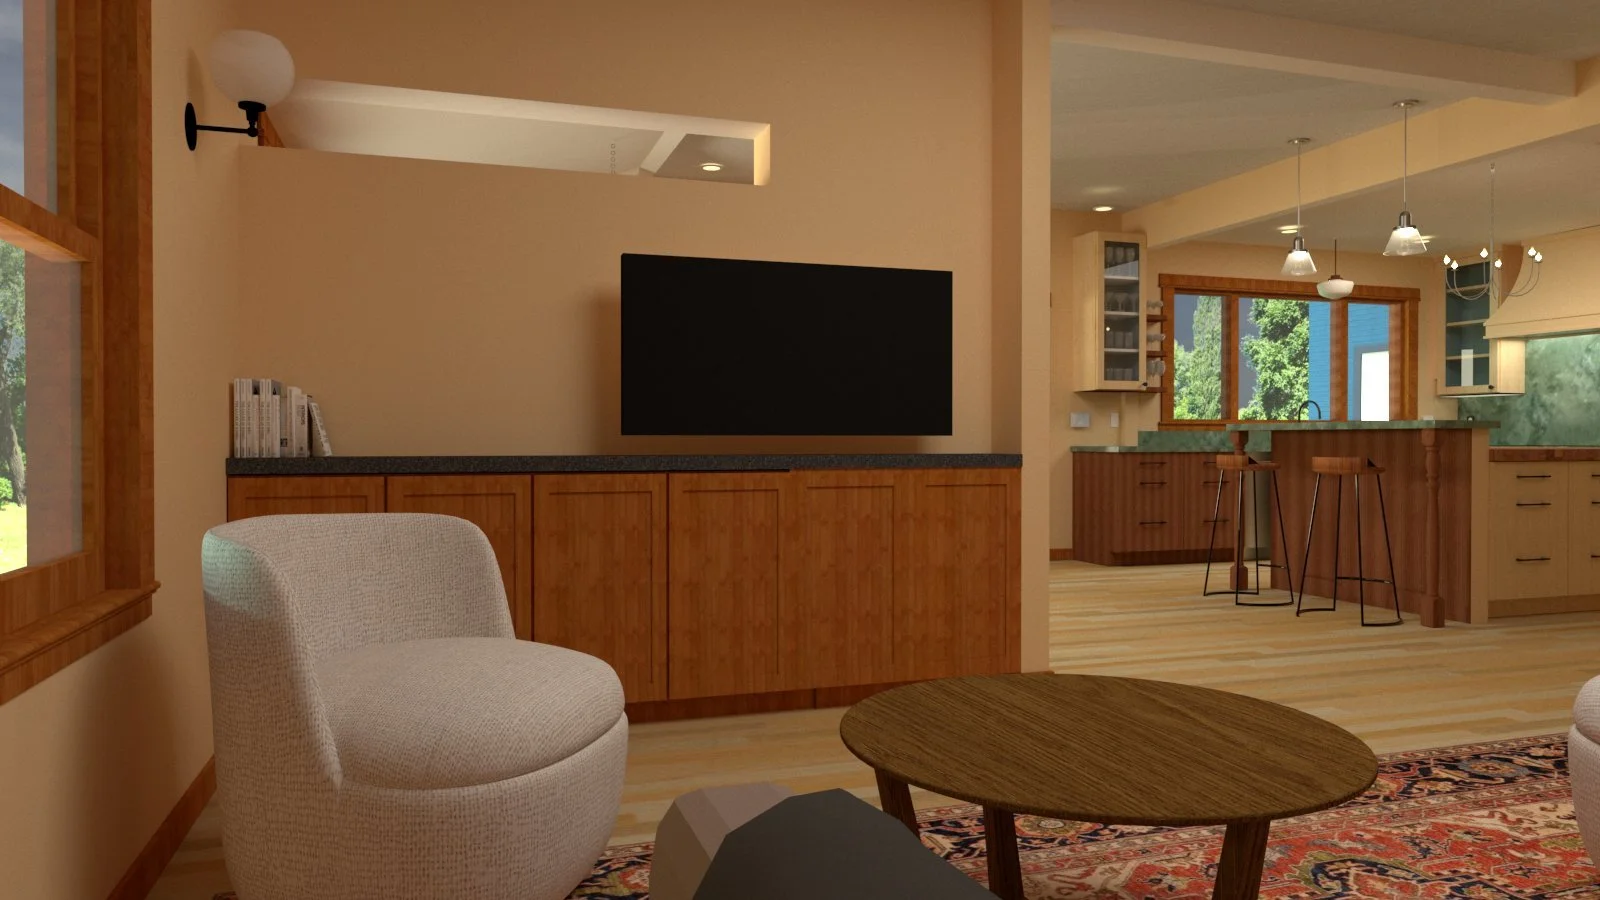
Below, you can see in the renders what TPK created to fix these issues.
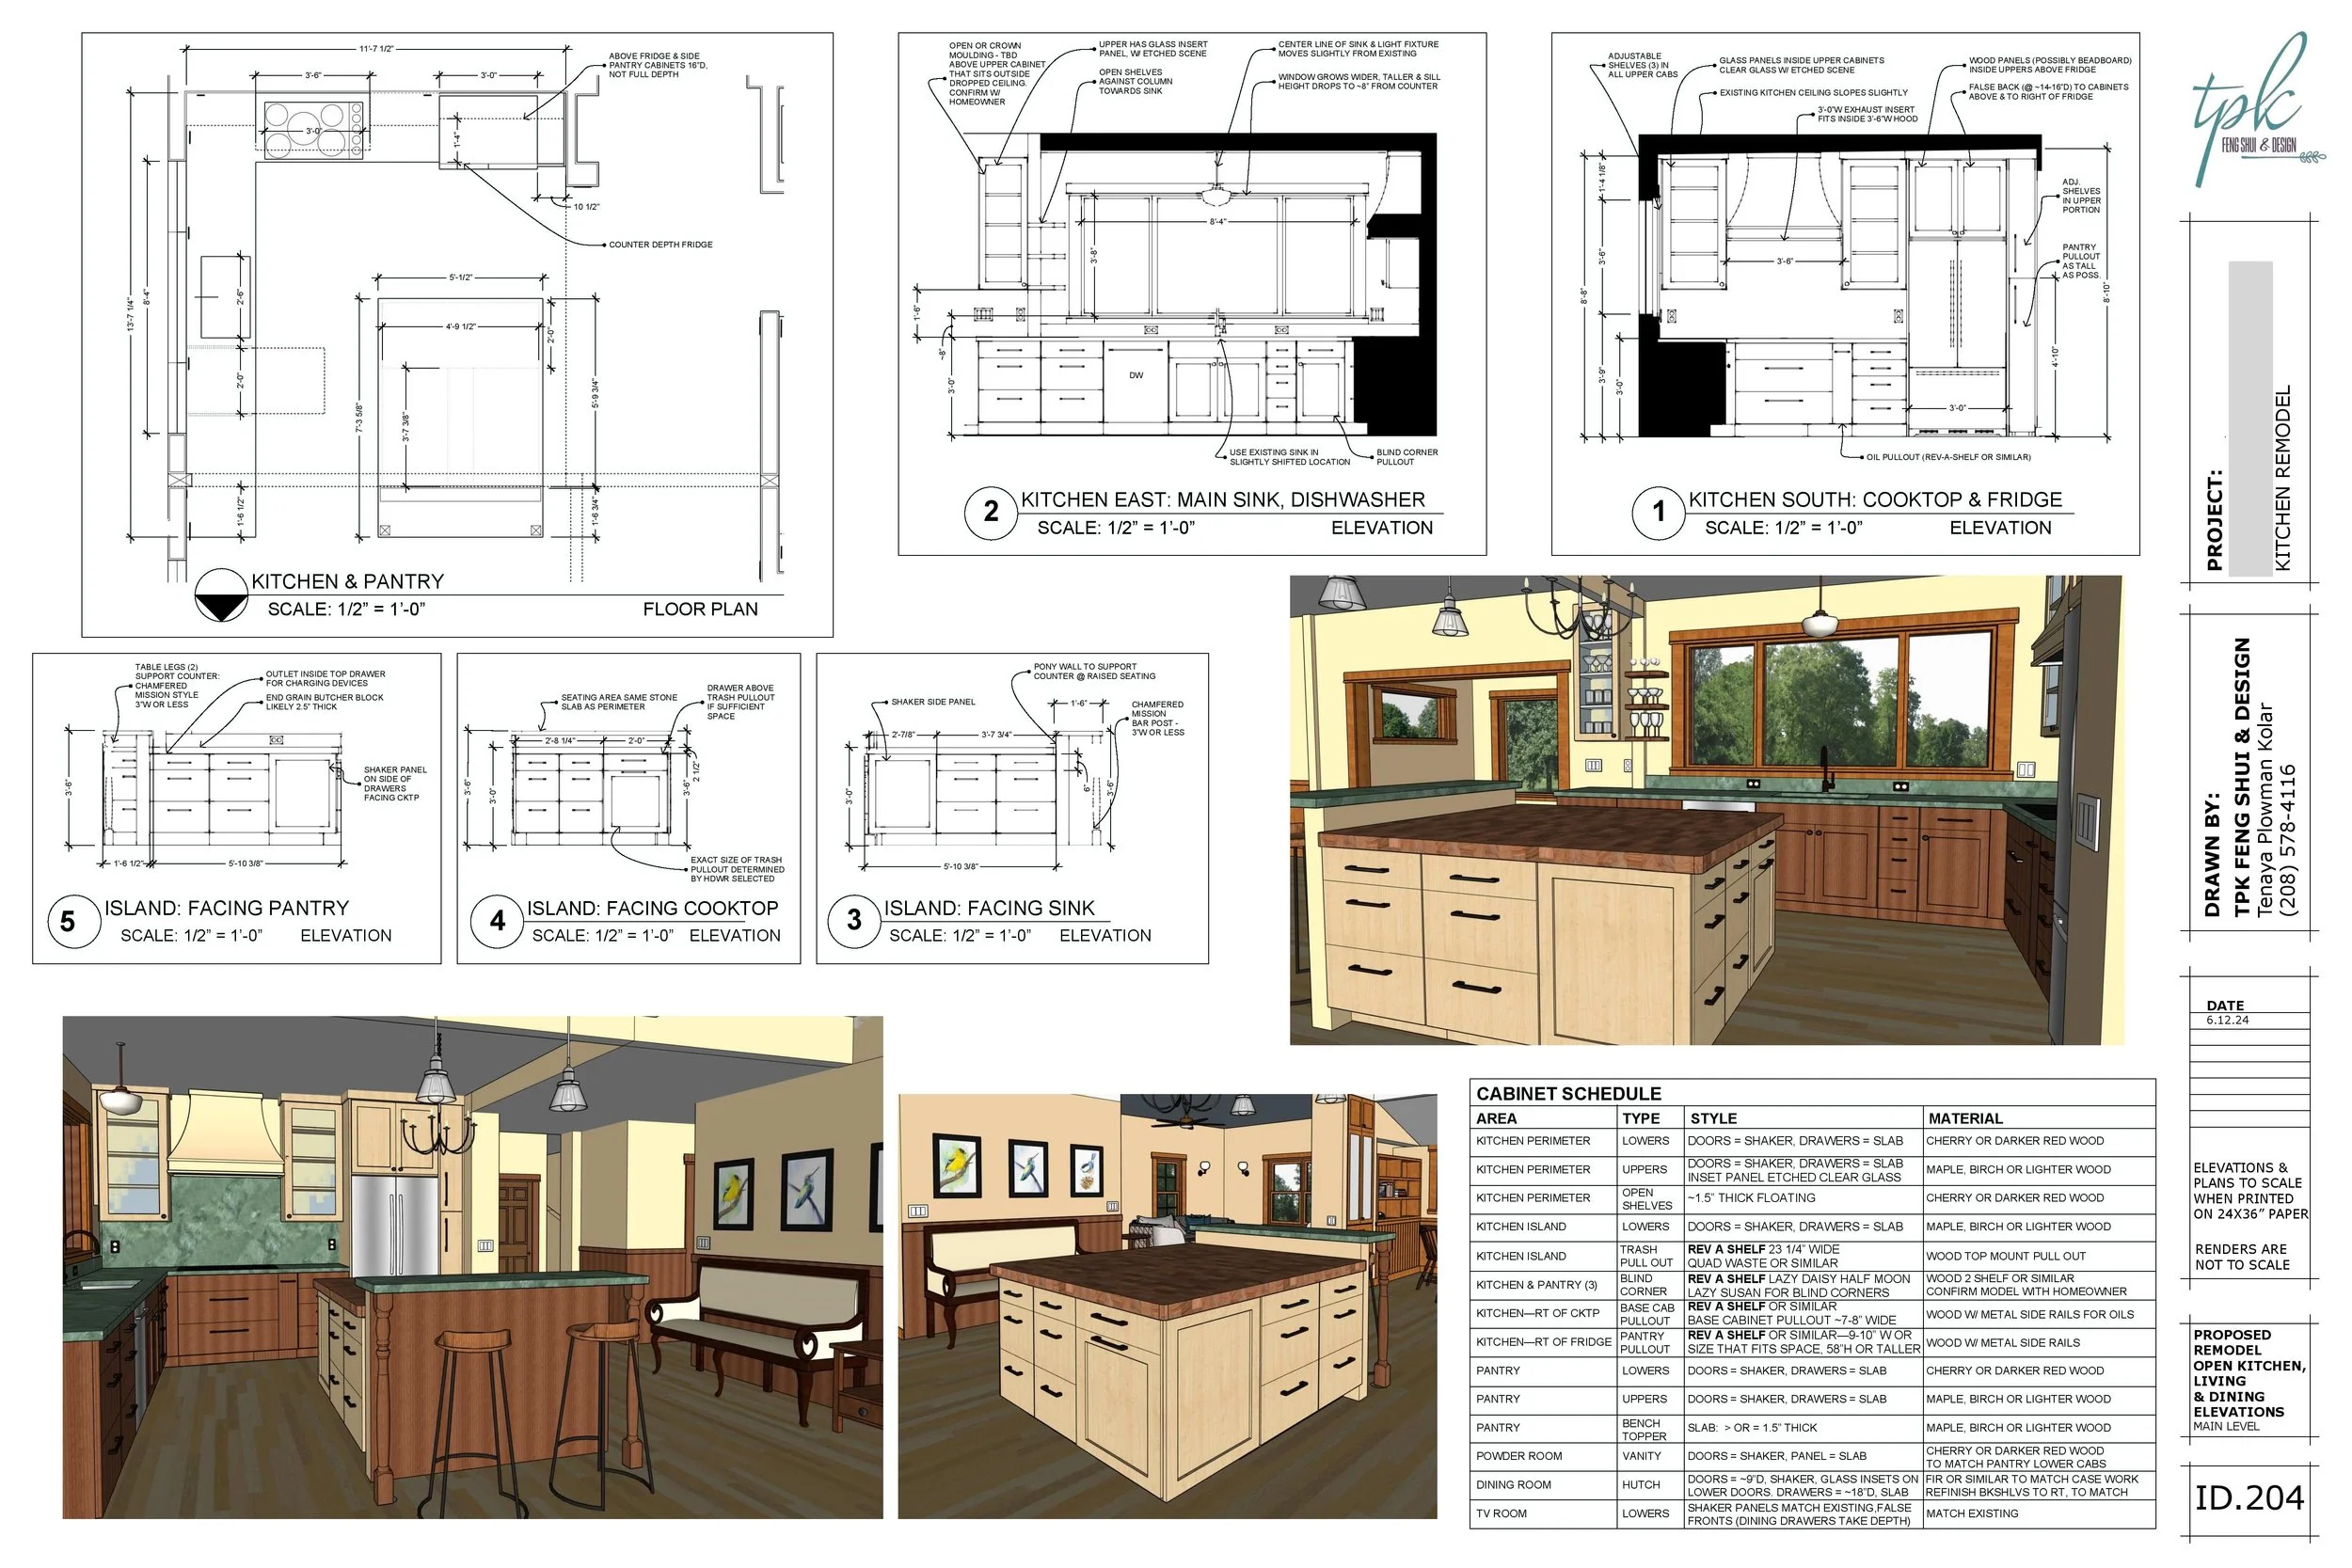
Please note: colors in renders are not fully representational of the materials recommended. This was one of my earlier examples of 3D photo-realistic renders and I was still figuring out how to massage colors. TPK always selects colors and materials with clients from physical samples.

In the updated remodel plans, we were able to
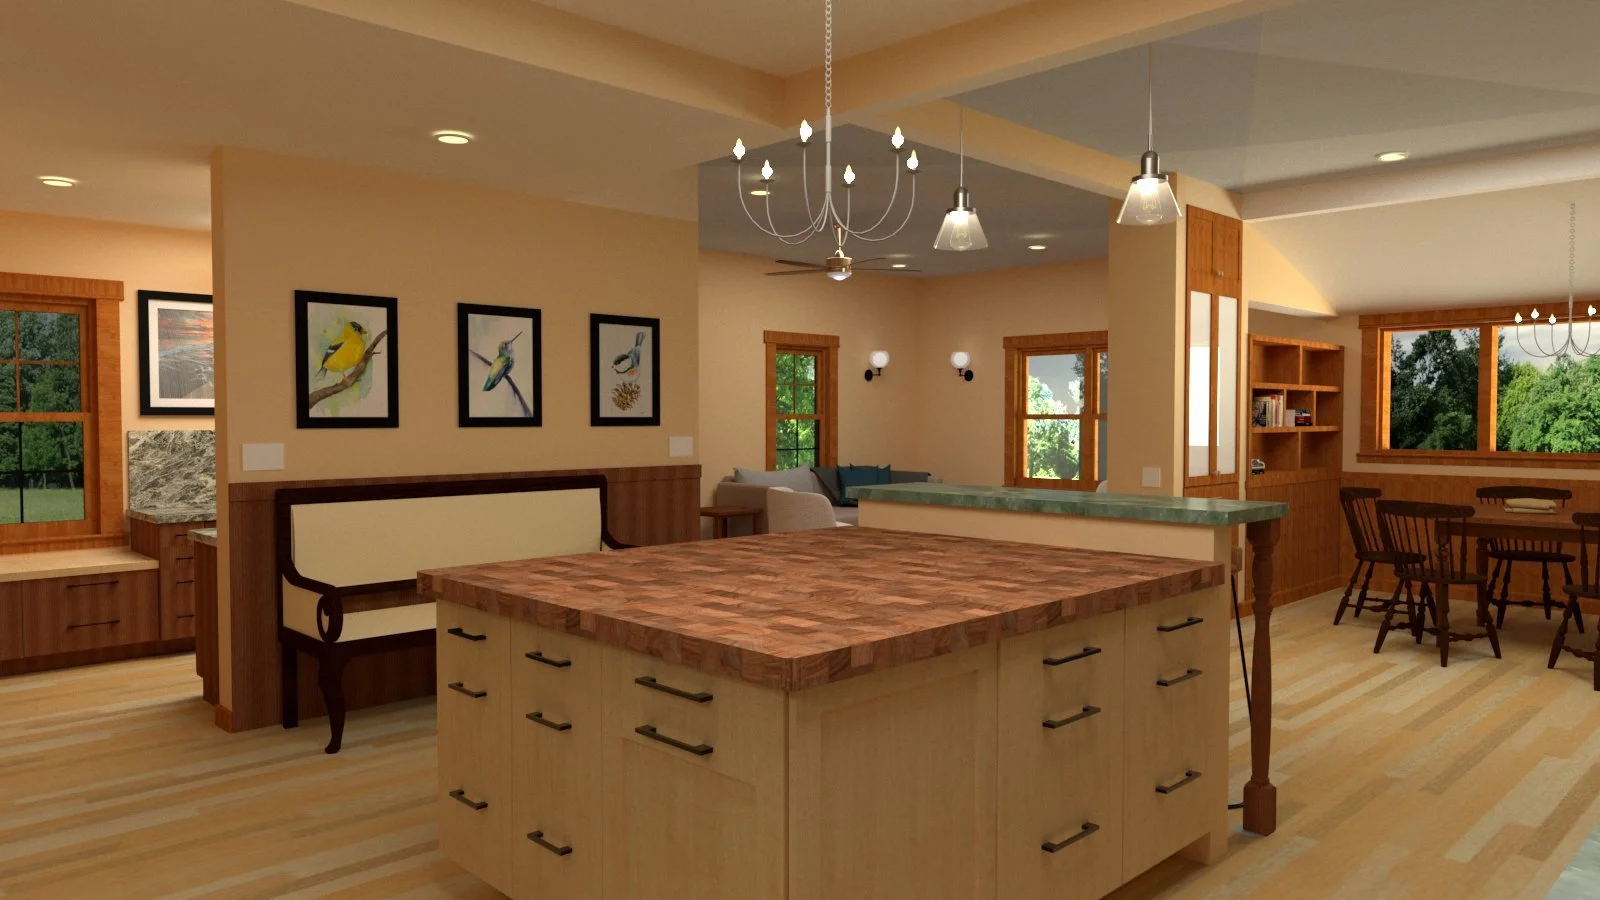
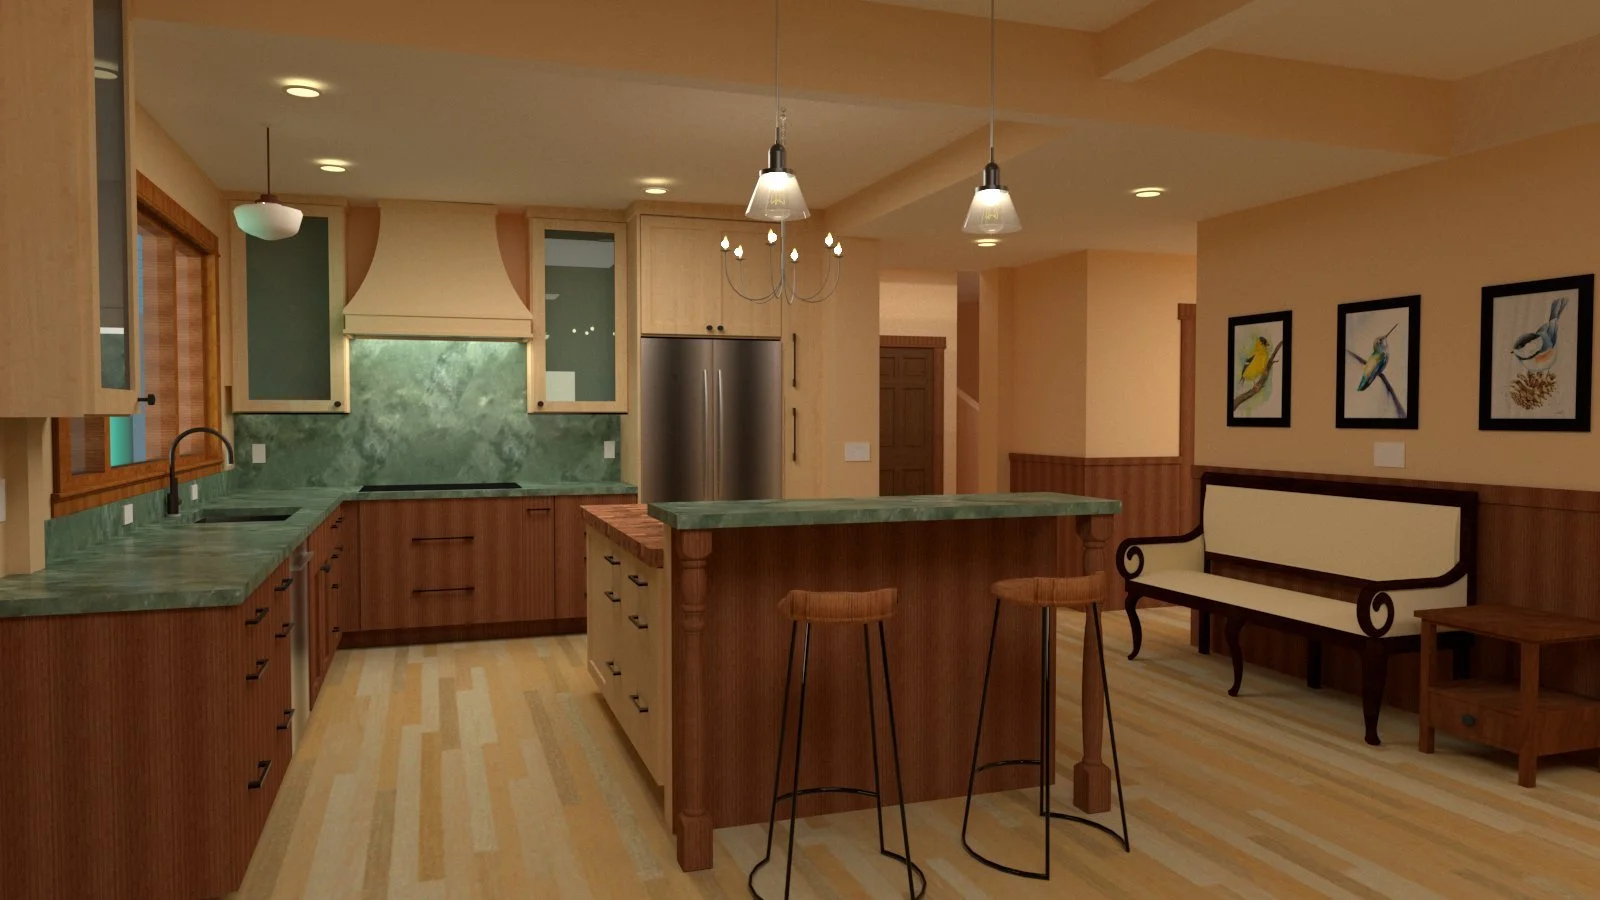
Create a gorgeous and functional kitchen space, which is the heart of the home for this couple who love making good food, complete with a:
central butcher block island, which allows for traffic to flow in and out of the kitchen from two sides
much more light streaming through the expanded sink window on the south side
Take the once awkward pass-through space to the sunroom and instead create a bar seating area connected to the kitchen island for family and guests to interact with the chef while dinner is still on the bubble.
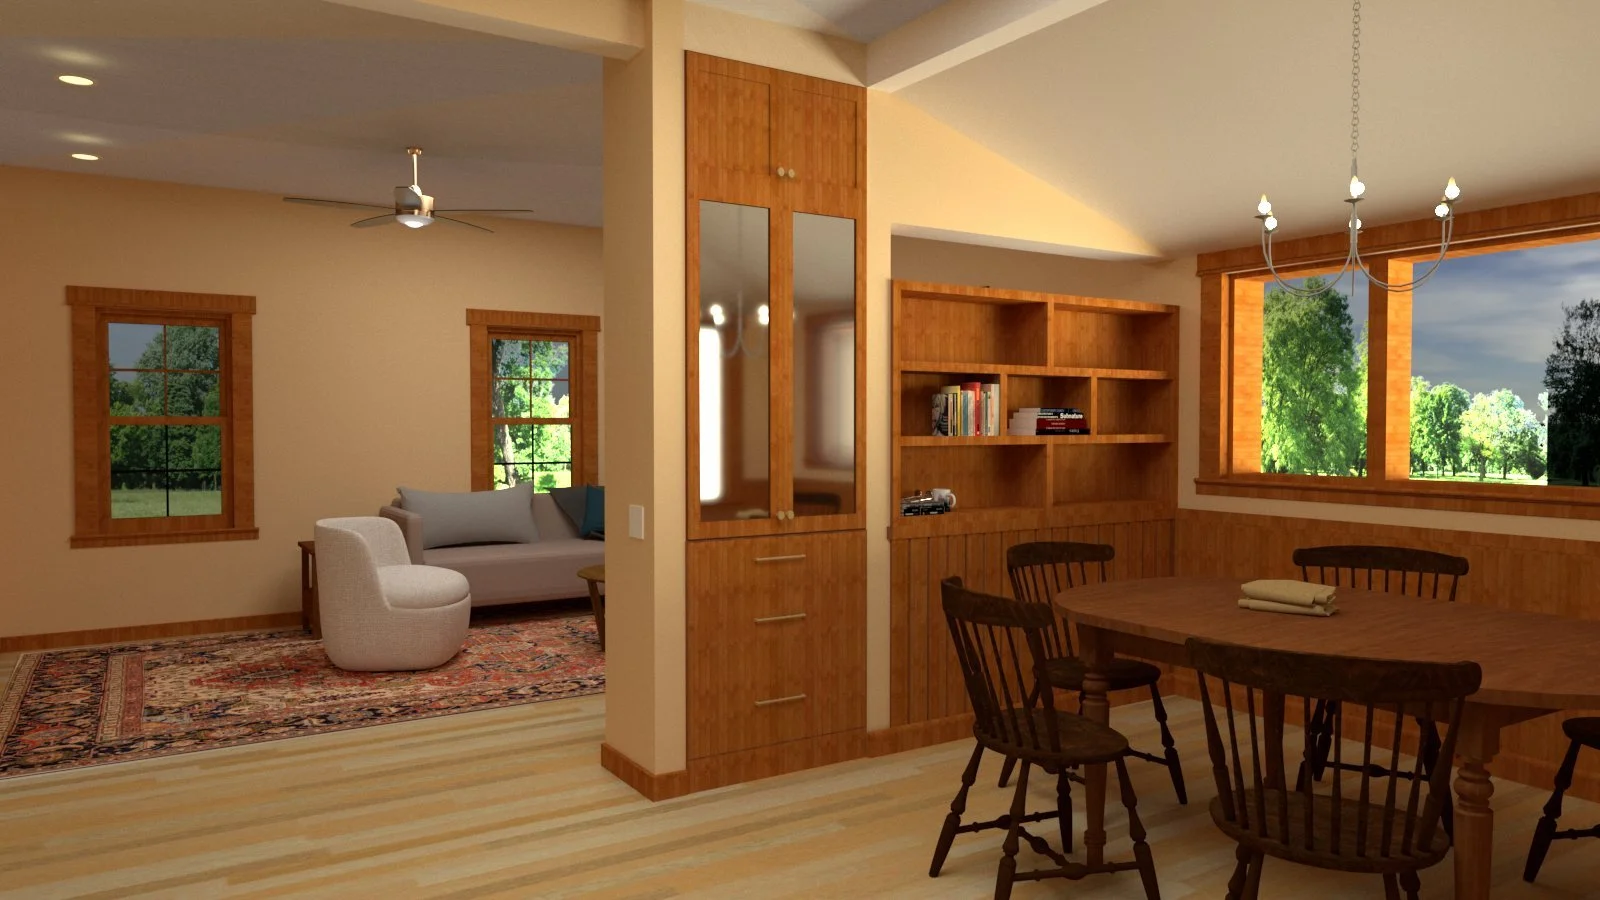
Further enclose the dining space on one side to create a:
Solid wall for the TV in the opposing room
Buffet storage for silver and place settings
Dedicated dining room with the potential to extend the table for larger family gatherings.
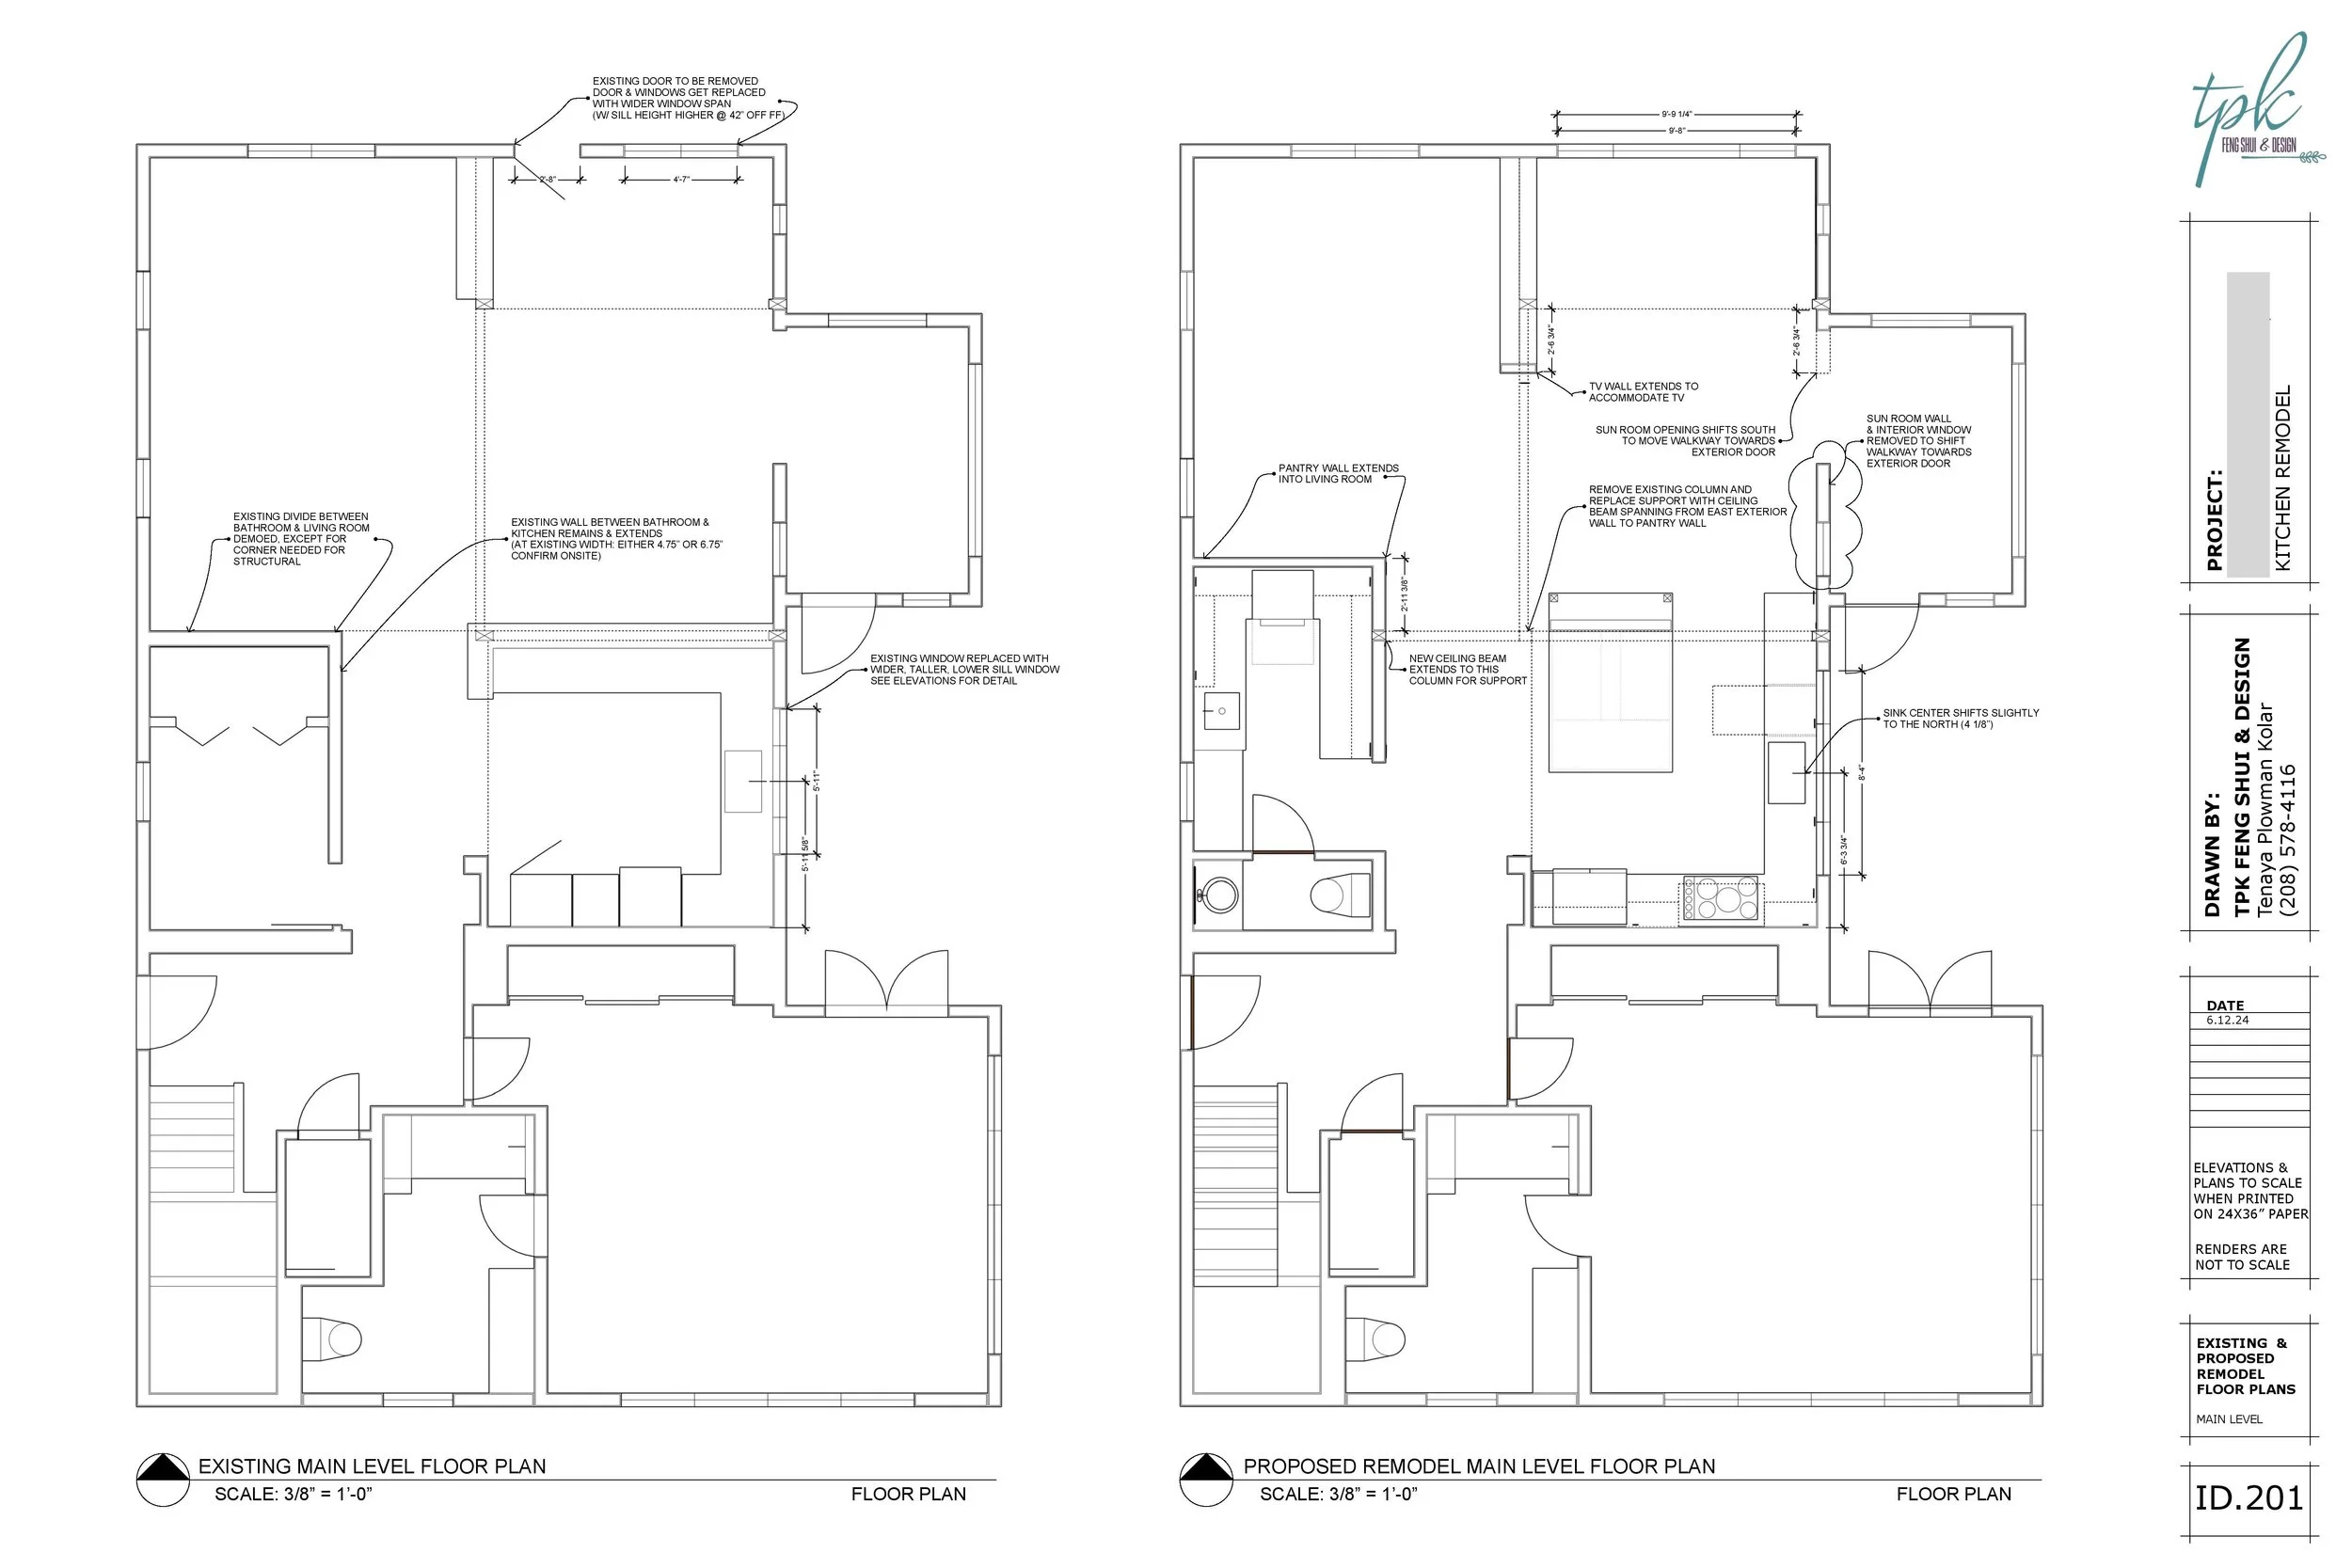
Replace the old front door (in the dining space) with an expanded window. This old entrance was never used and, with direct access to a busier street, felt too exposed. The expanded windows, with a higher sill, increased privacy and light in the space.
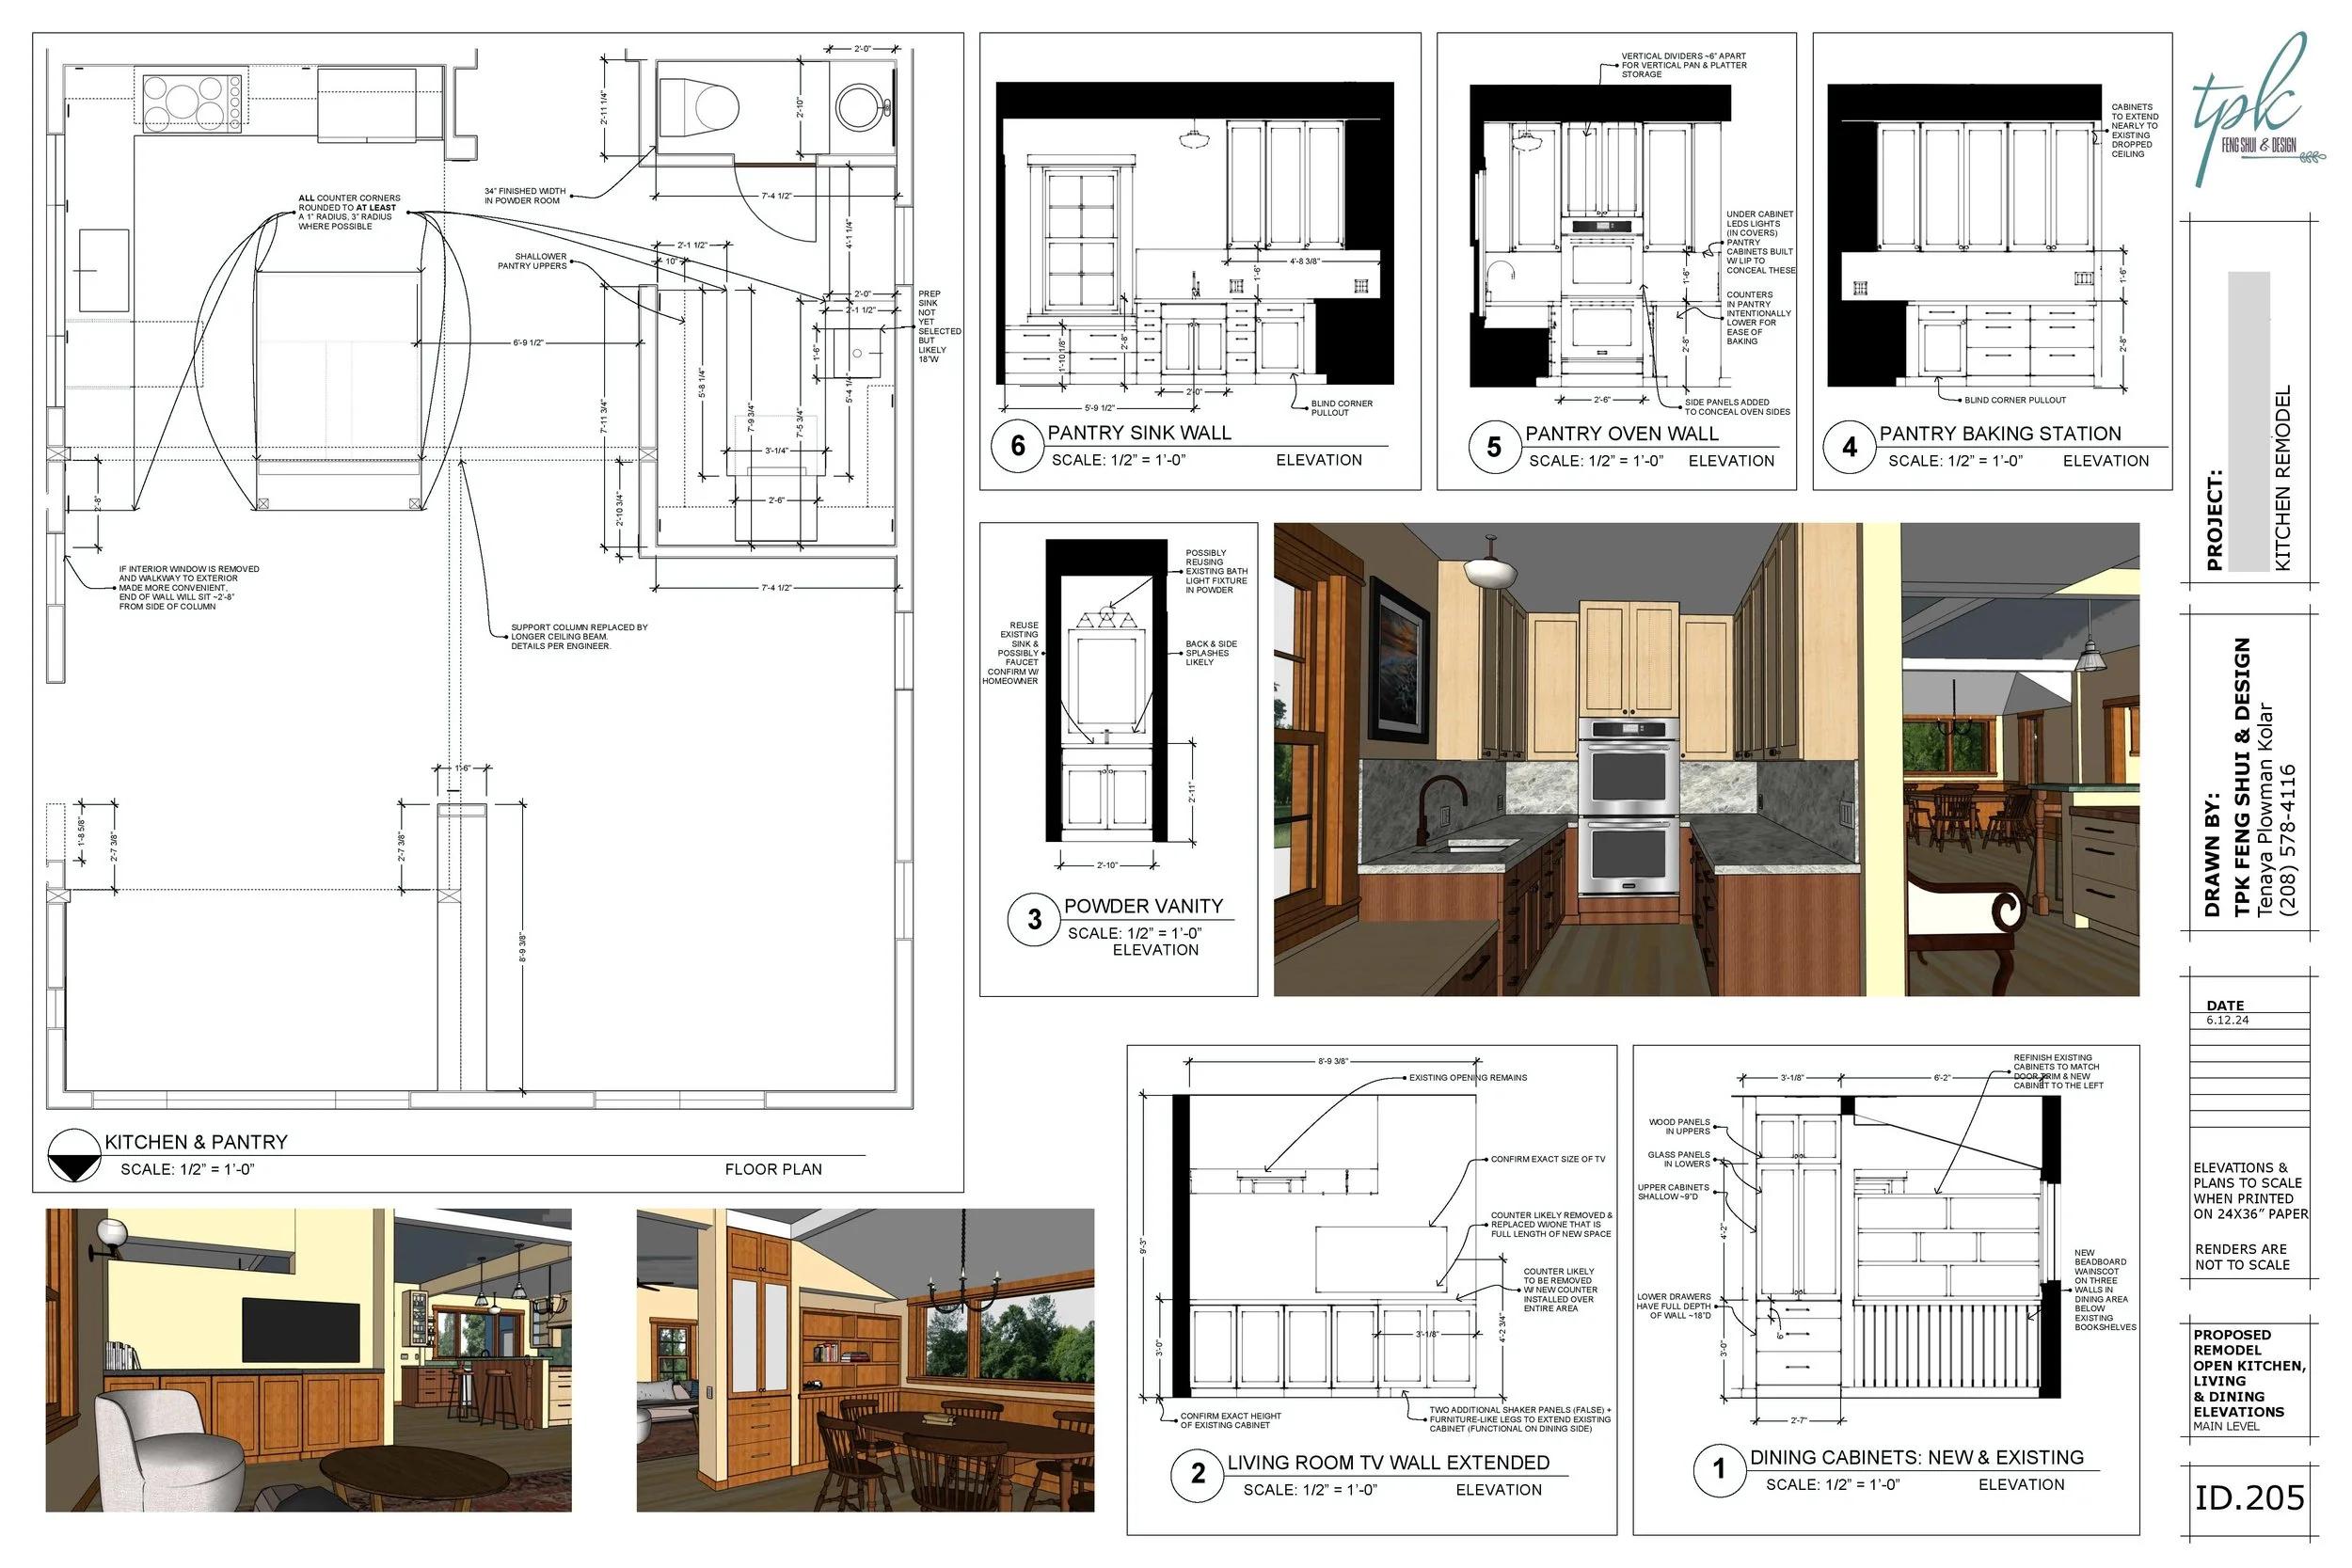
Borrow space from the too large TV room and the awkwardly large powder room, to create a full pantry connected to the kitchen, complete with a double-oven baking station and window seat.
Orient the TV so that it is hidden but accessible and the couch such that it is:
‘In Command’—you can see the entrance to the room from where you sit,
The proper distance from the TV—when the room was larger, it was awkwardly far, and
Relating to the rest of the space.
This cozy north-side room, which saw very little direct light, also benefited from the addition of two skylights.
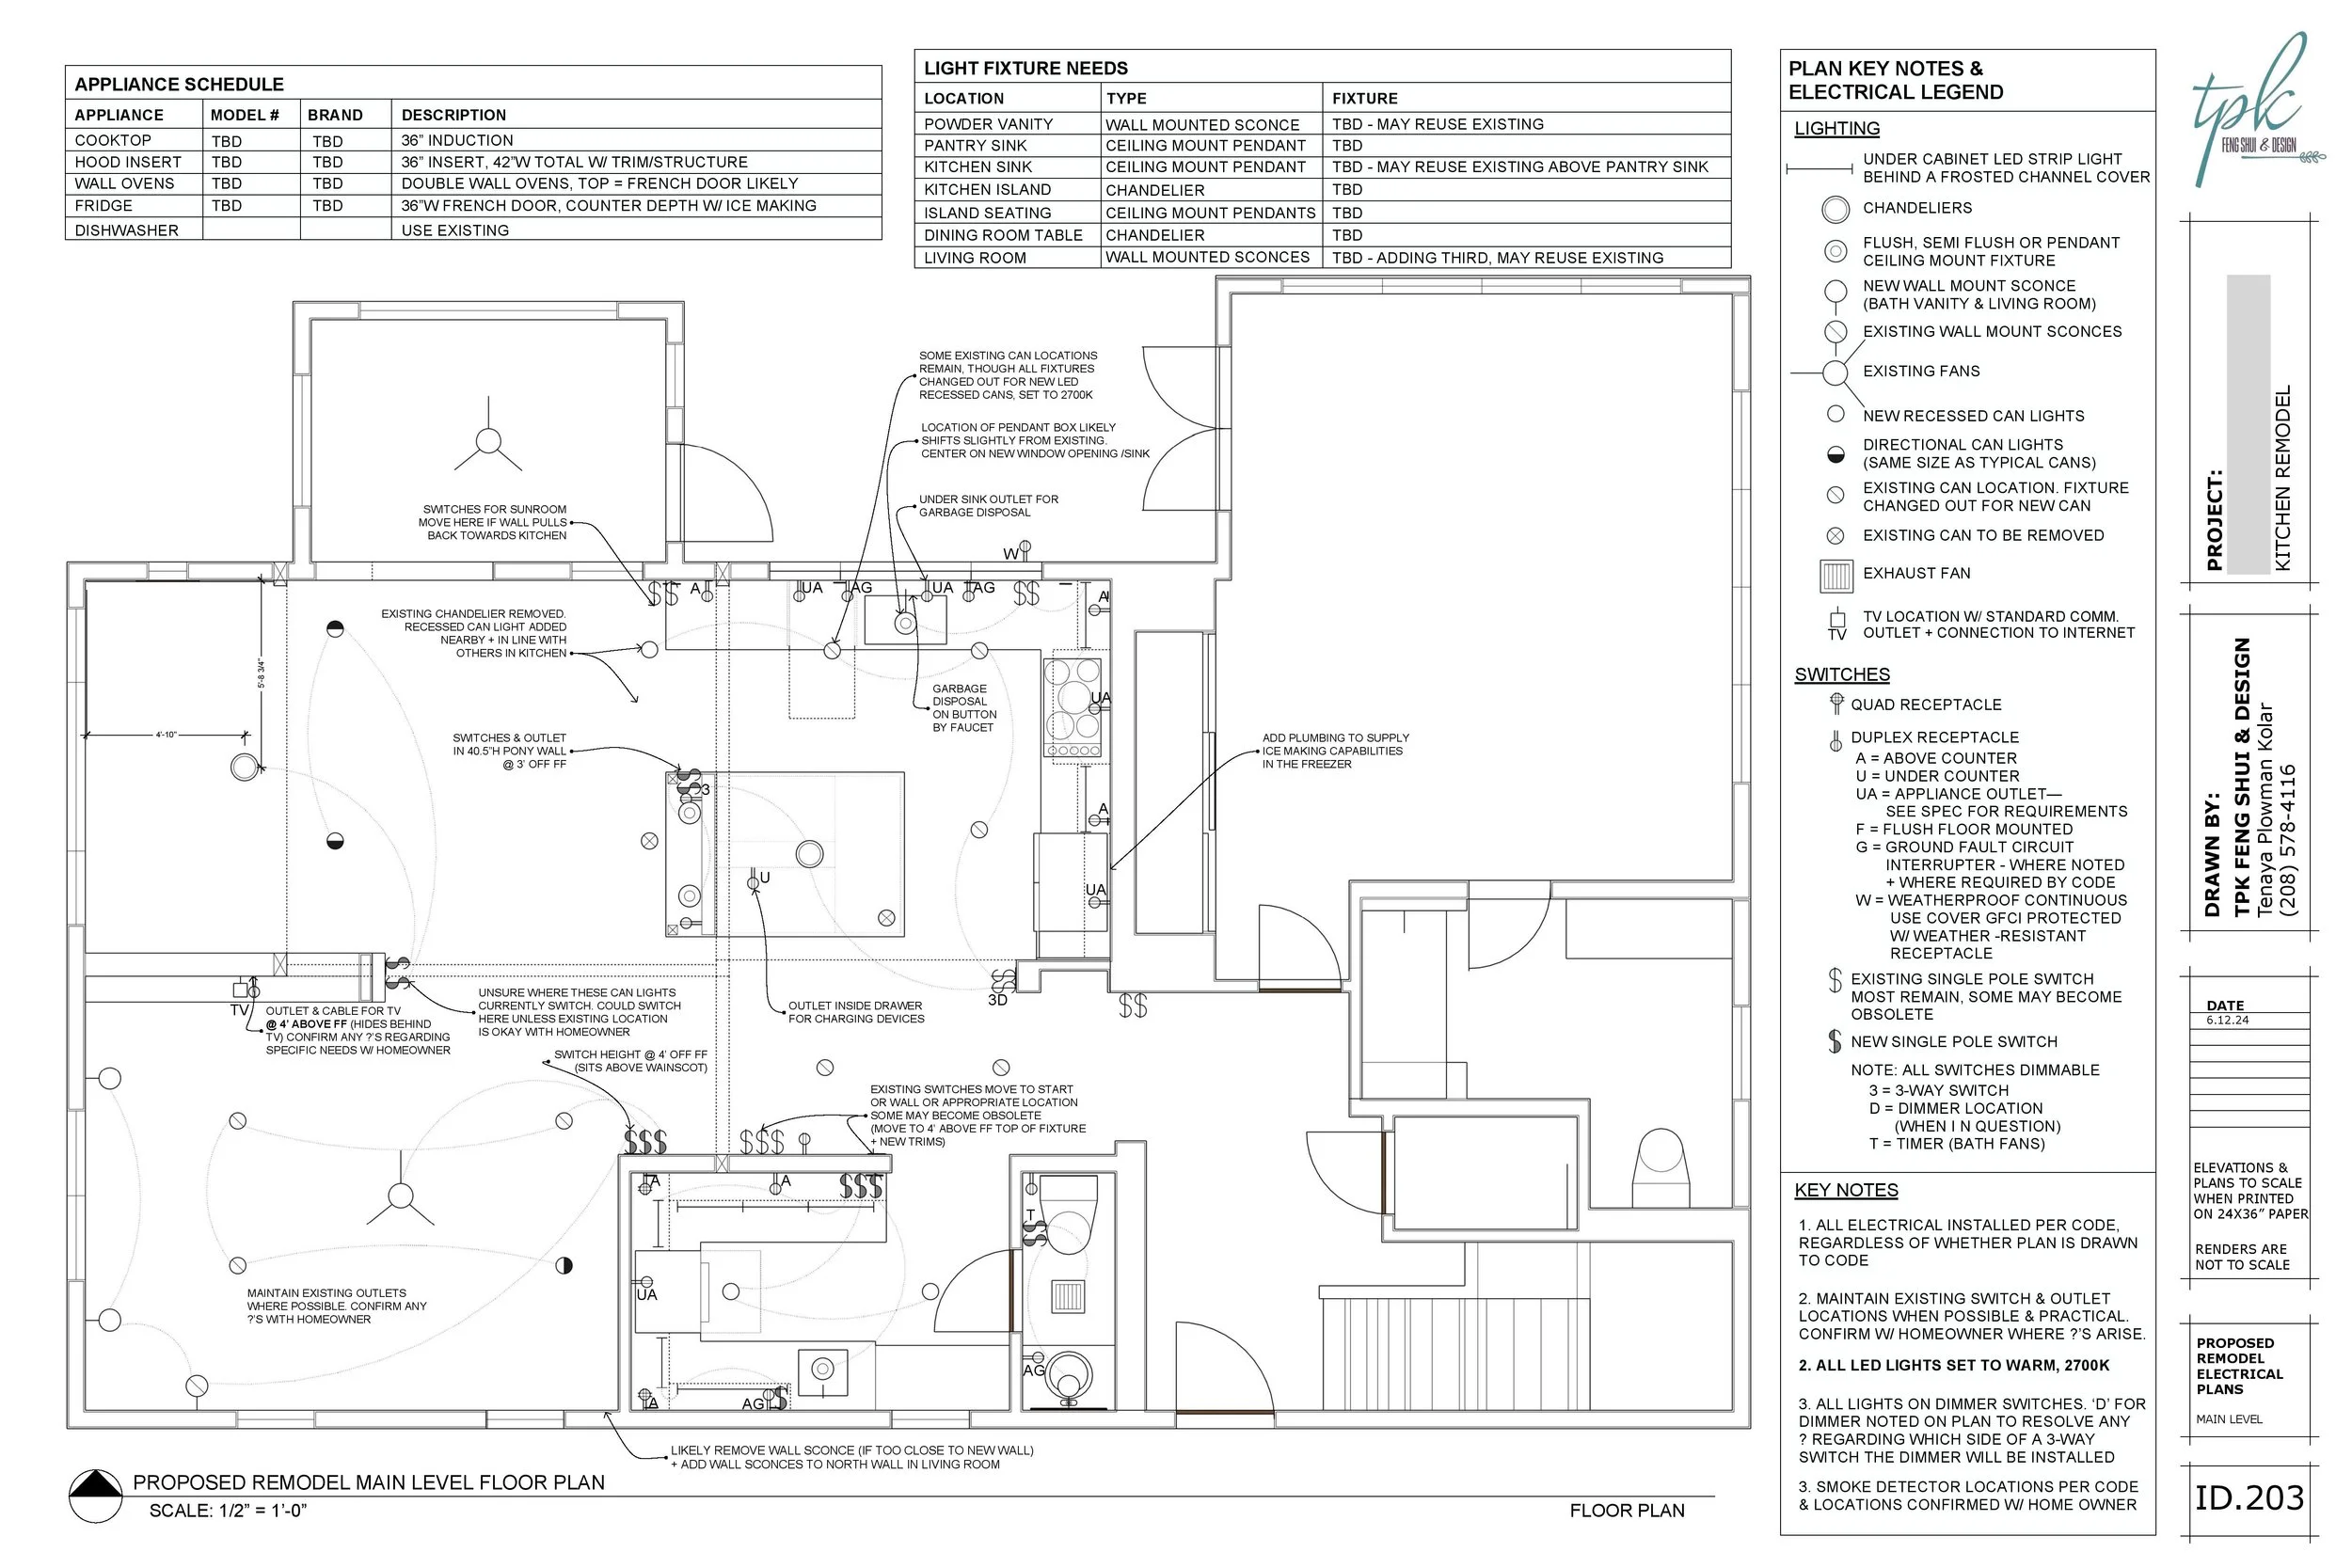
Since this project was further afield and not one where Tenaya was hired to be onsite regularly, the Design Set is as comprehensive as possible with detailed notes for the contractor to clarify the design intent. Plans below were printed as 24x36” construction documents.